Wednesday, November 5, 2014

REVIEW - Etsy Card Reader

Etsy recently announced their own gadget for taking credit cards, but with a new twist from other card readers.  It's meant to sync with your Etsy shop and provide a branded smooth experience for your in-person sales.  I got mine in the mail yesterday (it's free if you request one) and put it through a quick test run.

Packaging


First off, their packaging was excellent, as I would expect from the premiere handmade marketplace.  I got a few ideas just from their clever and simple presentation.

Here's the envelope it came in.  I love the idea of a branded envelope sticker.


The reader itself came in a sturdy reusable custom cut box made of what looks like composite wood.  Again, I love the brand consistency of the reader and insert cards with the orange and white.


Extra bonus!  The box itself has a slot on the underside where you can place the card to make a stand up sign.  One side of the card shows that you take credit cards while the other side is a "I'll be right back." sign with a spot for you to write in shop's address.


The Nuts and Bolts


I ran two test transactions, one of an item which was already up in my online shop and another which was a new 'quick sale' item not already present in my online shop.

You will need to let the app access your location and your microphone.  Your location is recorded and inserted into the receipt e-mailed to the customer later on, should they elect to receive one.  The hub of the app looks like this on an iphone.


You can control your inventory from within the app, which connects to your online Etsy shop (ie. renewing listings, creating new listings, putting your shop on vacation, checking orders, etc.).  The app is available for both Android and iOS markets, but not for the iPad, oddly enough

Be aware that a minimum $1 transaction is required for a customer to use a credit card.  You can also set your sales tax rate in the Settings so that this is automatically calculated when making your sales.  The funds from your credit card are added to your Shop Payments account (the same place as your Direct Checkout funds), so you will need to wait the usual time for the money to be deposited after your sales.  This usually isn't more than a couple of days, in my experience.

When selling an item in-person that is also in your shop:

  •  You choose the item in your online shop to sell in-person via a list.
  •  The shipping fee is automatically waived when an item is sold in-person.
  • The item is also removed from your online shop when it is sold, which will help save headaches on syncing inventory automatically instead of manually (ie. if you've ever had an item sell while you're out at an event and had to deal with the headache of explaining that it sold when you get back home).
  • There is no Etsy transaction fee like there are for online sales, only the credit card processing fee, which is comparable to other readers (2.75%).


When selling an item in-person via a quick sale where you type in a brief description and cost:

  • It is still counted towards your sold items stats, but only you as a seller can see those transactions in the Orders section of your shop.
  • There is no transaction fee or listing fee, only the credit card processing fee.


Promotional Automation


Now here's the really powerful feature of this reader.  After you make your sale and get to the point at which you can offer your customer an e-mail receipt, there is a checkbox which is automatically selected (you have to manually deselect it). The checkbox says this:


After you make the sale and the customer elects to be e-mailed their receipt and is opted in to Etsy's updates about your shop, the customer will get an e-mail like this:

Location map blurred for privacy.

I've asked my test customer to let me know what kinds of e-mail he receives in the future so I can see just how often these e-mails are sent out and what kind of info they include.  I will edit this post with an update once I know more about these communications.

Why is this powerful, you ask?  The items suggested at the bottom of the e-mail offer the customer a tantalizing glimpse at your other items, some of which they might be interested in that you might not have had on display where they were shopping in-person.  Because these images actually link to the items, they encourage further purchases without the seller having to lift a finger.

This e-mail communication is a powerful addition to simply handing out a business card, since business cards are easily lost and most shoppers require repetition of information before they truly retain that information.  So far, this is the only e-mail my test customer has received, which gives me hope that these won't turn into spammy communications.

Also, Etsy's current online market doesn't have a function that lets you automatically add your past customers to a mailing list, which is a feature I've always wanted.  I currently have to first ask for the customer's permission to add them to my mailing list, then add them in mailchimp manually, which takes up valuable time I could be working instead.  My newsletter only goes out once every 3 months, so I am curious to see how often this Etsy-managed newsletter will be sent out and how they might mesh with the information I already send out in my newsletter.

Bottom Line


The Etsy card reader doesn't do anything vastly different from other card readers, but it does allow powerful synchronization options between your online Etsy shop and your physical inventory that could save you time if your Etsy shop is your main outlet for sales.

It also allows for promotional automation that doesn't require you to lift a finger, saving you time, especially if you do not yet send out your own newsletter yet.

More updates to follow when I have them!

Monday, October 6, 2014

Commission Seasons

Recently, I've started the practice of hosting 'commission seasons'.  As an artisan with a day job in freelance illustration, I really need to put a cap on the amount of orders I receive so that crafting doesn't add too much stress to my life.  This equals a happy, healthier me!

What is a 'commission season'?  It is a time of the year that I will open up a limited number of commission slots.  These slots can be taken up by custom work AND made-to-order items, which I will only have on offer during the time that these slots are open.  The minimum number of commission slots that I will have on offer is 10 at once (perhaps more, depending on how busy I am).

Outside of commission seasons my shop will only be stocking items that are ready to ship out immediately.

My planned commission seasons right now coincide with my busiest times of the year, Halloween (season opens in September) and Mardi Gras (season opens in January).  I may open commission seasons once every quarter (every 3 months), but this will depend on how busy I am with other endeavors.

To be instantly notified of my availability for custom work, be sure to sign up for my mailing list!

As always, I'm a sucker for really interesting ideas, so if you have one to share, I might take it on outside of a commission season if I really, really like it.  When in doubt, just drop me an email!

Tuesday, April 15, 2014

Photographing a Mask Tutorial

I'm still moving my artisan craft blog entries from my art blog to here.  This post is from 2010 so when I say 'latest mask', it was my latest mask from 2010 at that point in time (which is old by my standards now).

It's time for yet another impromptu tutorial! Upon completion of my latest mask, I took some shots of my photography setup for the morbidly curious.

Disclaimer.
I am not a professional photographer! This is just the way I do things that gets results for me. I'm sure there are better ways to go about what I'm doing that I haven't discovered yet.

YOU WILL NEED:

A Decent Camera (I use a DSLR, Nikon D50 with a 28-80mm lens) - DSLR are great since you can customize the lenses you use based on your space and lighting limitations.  Point and click cameras, especially Canons, are pretty good these days too. I suggest getting a tripod to keep your camera still, unless you can hold it still, which is impossible for this particular caffeine addict.

Indirect sunlight with
soft shadows is what
we need!
Naturally Lit Space - I use our sun room, which has tall open windows that let in plenty of natural sunlight.  I tend to take photographs in the late afternoons so the sunlight filters in instead of shining directly into the room, creating harsh shadows.

TIP: A white muslin sheet hung over the window can help filter light as well!

Crushed Velvet Backdrop - I use a piece of silver crushed velvet fabric I purchased by the yard at Joanns Fabrics.  It provides an interesting backdrop that isn't just a flat area of color since it's lightly textured, but also not strongly textured or patterned enough to be distracting.

TIP: If you don't have fabric or sheets for backdrop, try a piece of mat board.

Car Windshield Shade - A plain metallic shade meant to reflect the sun from your car windshield. It can be used to reflect light onto your photography subjects as well!

Burts Bees is the
best, for lips
AND propping!
Chapstick - For propping your mask if it doesn't want to stand up by itself. Or for those with constantly chapped lips, like myself.

Photoshop - I use Photoshop CS2.  Other alternatives include the free program GIMP and any of the photo editing software that generally comes with your camera or printer.


Step 1 - Set Up Your Area.
Start by arranging your mask on the tabletop which has been covered by your backdrop cloth. I like to arrange my masks facing towards the window so that the highlights are on the right side or front, illuminating the most detail usually in the nose area.

Next, put the reflector next to the opposite side of your mask which is in shadow.  I've wrapped the reflector around a chair to keep it upright. Prop the mask with the chapstick.

I've also made use of a low night stand, which works well since it is lower than my tripod and lets me view my mask from above, allowing me to photograph the most surface area of it. The tension of the backdrop fabric draping over the table's edges also keeps the backdrop flat, where it would wrinkle and be hard to manage if it were laid out on the floor.

TIP: The closer the shade is to your object, the more strongly it will illuminate your shadow side.

Step 2 - Photograph Your Mask.
Using your preferred camera settings, take shots of your masks.  I set my camera to the Nature/Macro setting (a little tulip icon) since I don't have a lot of space to back up and zoom in to get the best shots and angles with an actual macro lens.  This setting allows me to capture closer shots at a shorter focal range.

I like to take three angles on most of my masks, a front angle and two side angles.  This allows me to show the varying detail on both sides.  If the focus of the mask is on the side, as it is in this fox mask with the fox's face being on the right side, I like to make my main display image a 3/4th's angle to show off more of the mask's focal point.

Interlude - The Importance of Reflected Light

To illustrate the importance of reflected light, check out how much darker this image was before I used the windshield shade. The details in the fox tail are almost completely drowned out!


Step 3 - Post Processing
Before you can show your masks to the world, make sure the details are visible and sharp.  I use Photoshop to alter my photos, but you can also use a free photo editor that most likely came with your printer/camera or GIMP, a free image editor which works much like Photoshop.

The tweaks I use the most are under Image>Adjustments>Exposure where I usually up the Exposure and Gamma until I'm satisfied my image isn't too dark.  This tends to work more effectively than using Contrast/Brightness, which can drown out your detail in unsubtle ways.  (I use this method of tweaking a lot for my watercolors to preserve their color and sharpness too).  Sometimes, I like to use Smart Sharpen (under Filter>Sharpen) to help define the detail on the mask even more.

TIP: Don't up the Exposure too much or you'll start losing the details in your image! Notice how the Fox's stomach fur starts to lose detail when I've raised the Exposure too much. Pay attention to your highlights when tweaking a photo. You want to bring out as much detail in them as you can before they start to get lost.


And that's it! Here's the finished montage:


Friday, April 4, 2014

Custom Orders Disabled + Upcoming New Designs!

I wanted to let you guys know that I've temporarily disabled Custom Orders at my Etsy shop.

However, don't lose heart!  I am doing this because I'd very much like the time off from fulfilling orders to work on some brand new designs.  I hope to come back later with some amazing new items to really knock your socks off!

This also means that what you see is what you get at my shop right now!  This will be your only chance to grab my current inventory till my new line of items is up.  So get them while they're hot!

Have a sneaky peek at some of my new design tinkering just to wet your palettes:

That's right!  Crowns and circlets are coming soon!  I wanted to figure out an option for eyeglass wearers (including myself!) so that we can still look pretty even if we can't wear traditional masks.  Can't let the mask wearers have all the attention!

I'll keep you guys posted with new design sketches in the meanwhile.  Don't forget to grab what you can in my shop before it's gone, if you have your eye on something specific!  I will not be re-stocking for a little while until new designs are ready.

Wish me luck!  I'm excited to get started on these new inspirations!

Saturday, March 8, 2014

New Patreon Intro Videos

This week I was finally able to complete swanky intro videos made for both of my Patreon pages! You guys should check them out and tell me what you think. You'll get to learn much of the following:

- The specific artist who made me want to be an illustrator.
Why I wanted to be a mask maker.
- What kind of art I was drawing involving masks back when I was a teen.
- What my masks looked like before I discovered leather. It ain't pretty!

Plus other odds and ends. Enjoy the trip down memory lane! 


Now, I can get back to actually *making* art, for as fun as all this video editing has been. So many outtakes...so...many...

The intro for my Art and Illustration page:


The intro for my Artisan Crafts page:


Thursday, February 6, 2014

Design Diary: January's Mask

I thought I'd post some design notes for the curious who want to know what I do when I'm not drawing, reading, or writing. I'm hoping to start a new series featuring a revamp of my old Angel of the Month series that got started, but never finished. What better way to get in the mood than to do a mask inspired by similar themes?

Like most of my paintings and writings, mask-making begins with a little research. Nothing gets my muse tingling more than lore of the land!

On January Lore
January may seem like a boring uneventful time, but the lore of the month is fraught with interesting imagery. Named for Janus, the Roman god of beginnings, endings and gateways, January is a time of hope, purification and the promise of a new beginning.

The birthstone for January is the Garnet, which can be found in clusters and is often equated to pomegranate seeds which are in turn associated with the damnation of Persephone to the Underworld. The grasp of Hades is coming to an end as January begins and Persephone awaits her time in the sun, ushering in the Spring.

January's flowers are the Carnation and Snowdrop in western cultures. Carnations, while seen as a generic flower of affection and reunion in florist shops, have a darker meaning in Mexican Indian culture, where they are 'flowers of the dead' piled around the bodies of the recently deceased before they are buried.

In Korean lore, three carnations were used to divine which phase of an individual's life would contain suffering and hardship by watching to see which flower would wither first upon being placed on the forehead. The Snowdrop's habit of popping up through the snow in graveyards became a portent of death and ill fortune to the Victorians.

Mask Layouts
Informed by the themes of January's lore, I worked out a few thumbnails to get a basic idea of the shape and flow I wanted in the mask.


The 1st one was the most ambitious featuring piles of flowers at the edges. Too busy, however (and a little evil-looking)! The 2nd had a nice contrast between details and texture, but it didn't feature the Snowdrop element as much as I wanted. The third seemed the best balance of the Snowdrops at the side of the eyes, the Carnations in the middle and a graceful compositional flow from the center outward and into the eyes and brow.

Tracing, Carving, Tooling!
Next came drawing the pattern onto printer paper, transferring to leather, a cup of coffee, tooling and carving with chisels and burnishers, and finally shaping and baking the leather! If you want to learn more about the specifics of the process, I learned from the best, Andrea MasseBrenda Lyons, and my own experimentation.


Final Design
After some careful painting with acrylics and a few layers of satin varnish, the final product emerges! It came out rather Christmas-like, but that feels somehow fitting for this type of moody January.


For more crafts from me, check out my artisan account on DeviantART.
(It's where all my hobby endeavors wind up these days!)

Setting a Cabochon in a Leather Mask

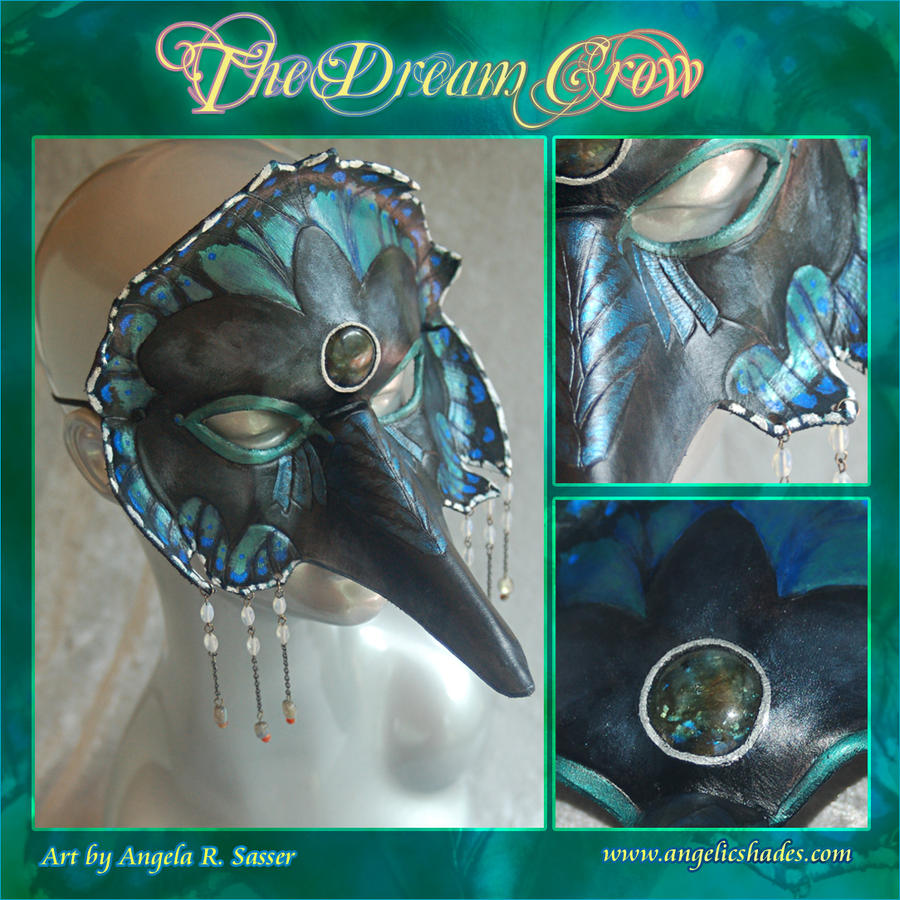
With all of the crafts I've been working on for my display at DragonCon, I'm really pushing my limits as a mask-maker and trying techniques I haven't before, including setting gemstones. I took photos during this experiment and thought I'd turn it into a tutorial for you all!

(Many thanks to Brenda and Andrea for their useful tips on this.)

The finished process should look similar to this.


You Will Need:

  • A Cabochon - You can buy these at many places online or at hobby art stores. I bought the Labradorite cab I used in this project from AliveGems on Etsy.

  • Epoxy or All-Purpose Glue - For attaching stone and other non-leather things to leather.  I use Goop.

  • Thin Leather Scraps - These should be at least a little bigger than your cabochon to be used as backing.  I used thin pieces I had split off from thicker leather using a Skiver. You can purchase bags of thin scraps at Hobby Lobby as well.  They will not be visible in the final design, so can be any color.

  • Tanner's Bond Leathercraft Cement - For glueing leather to leather. Goop will work just as well, but in my experience this has been the best thing for leather-to-leather attachment and is not as unwieldy and...well...goopy as Goop. The fumes are not as severe either.  It has a consistency more like Elmer's Glue.  It's easy to apply and easy to clean up.

  • Scissors - Good, sharp scissors for cutting heavy paper (or in this case felt).

  • Gum Tragacanth (optional) - Used to slick edges and smooth rough surfaces in leather.  It is vegetable based.

  • Bone Folder or Modeling Spoon - Or even a pen cap with a rounded edge. Used for burnishing and smoothing edges of leather.

  • Sponge - For dampening leather before you tool or carve it.

  • Sticky-Back Felt - I bought mine at Hobby Lobby.  They sell an eco-friendly sticky-back felt made from recycled bottles. You peel off the back to reveal the adhesive.

  • Metallic Paint Pen - This should be the color you want your 'bezel' to be. I used DecoColor Liquid Silver for this project.

  • Pencil - A plain graphite pencil for making marks on the leather. Don't worry, the marks won't be seen in the end.

  • Utility Knife or Heavy Duty Xacto Blade - For cutting out the opening. Needs to be able to cut through thick leather.


Step 1 - Place Your Cab

Figure out where you'd like to place your cab in the mask.  Higher up on the forehead where the surface lays flatter is an easier area to do this.  Once you place the cab, trace around the outside with a pencil.

PROTIP:
I placed mine a little too low on the forehead where the mask curves in towards the bridge of the nose, which led to my cabochon bezel looking a little askew in the finished product due to the leather warping around the cabochon opening.

Do yourself a favor and place your cabochon higher on the head than I did.


Step 2 - Sizing the Cabochon Opening

Next, trace about 1/16th of an inch in from the outside of your cab's outline.  You can do this with a compass or a stencil, but I did it very carefully by hand.  It doesn't need to be ultra precise, but it does need to stay true to the shape of your cabochon, which might not be perfectly round anyways. 

The opening should be slightly smaller than your cabochon so that the edges of the cab will be hidden once it is put in place beneath the leather surface so that the upper portion protrudes through the opening.


Step 3 - Cut the Cabochon Opening

Very carefully and slowly, cut out the opening of your cabochon along the inner line you drew.  Don't worry about the outer line being visible as that's going to be beveled off in a later step.  Notice I miscut while I was cutting out my opening? I was able to save this mask by beveling out that mistake.


Step 4 - Bevel the Edges

Using an Edge Beveler (I used a Sz 2), bevel off the edges on the flesh side and the rough side of the opening.  This creates a rounded, more professional edge.  The area of this bevel edge on the flesh side will also act as the fake bezel for the stone in the finished product.


Step 5 - Slick the Edges (Optional)

Using Gum Tragacanth is entirely optional, as you can simply smooth an edge with a burnishing tool of some sort.  I find that if you use Gum, however, that it more efficiently and permanently smooths frays and rough areas.

Take a damp sponge and dab Gum Tragacanth onto the freshly beveled edges then rub a Bone Folder or Modeling Spoon across the edge until the leather becomes slick, dark, and shiny.  This helps to smooth all the frays in the leather.

PROTIP:
If you're using leather dye instead of acrylics for your color, be warned that applying gum might cause the leather to be lighter in the area where dye has been applied.  Acrylics, however, seem to have no problem coating right over the top of leather slicked with gum.


Step 6 - Finish the Mask


Before you set the cab, you'll need to finish the rest of your mask.  Get all of your dying, painting, and varnishing completed.  Now the cab is ready to pop in the hole!


Step 7 - Attach the Cabochon


Using a dab of Goop, glue the cabochon to the scrap of thin leather and wait a few minutes for it to set.


Step 8 - Set the Cabochon

Attach the scrap leather with the cabochon to the mask with the leather cement. Apply the glue to both surfaces then firmly press them together and hold them in place for at least a minute.  You also want to press firmly on the cabochon so that it protrudes through the opening and fits snugly in it.  Be careful not to force it all the way though!


Step 9 - Draw the Bezel

Using the silver paint pen, carefully draw the bezel around the edge of your cabochon.  Be sure not to get any paint on your stone!  The bezel looks most convincing when it fills in the small beveled edge that surrounds your stone.

PROTIP:If you should get paint on your stone, quickly wipe it away or lightly scratch it out with the edge of your fingernail or credit card. Rubbing alcohol is a good last resort as well.


Step 10 - Making it Comfortable

Success! The cabochon is attached!  You don't want the edges of the scrap leather chaffing the wearer's forehead so I cover the area up with sticky-back felt. Just cut the size you want, peel off the sheet from the back, and stick it on the mask. 

My piece was old and had lost some of its stickiness, so I used Goop in key places to make sure it would stay.


The Final Product!

My mask is a bird! Your argument is invalid!