March's Mask was an interesting color palette challenge. April's Mask proved to be yet another challenge with its inspirations, the diamond gemstone and daisy birthflower! First off, how does one represent diamond? In the past, I've been making the main part of the mask match the color of the gemstone, but if I simply made this mask white, it could easily be confused with pearl. The solution - interference paints! More about them in the WiP shots coming up.
Reference Gathering: The usual mood board in Pinterest. Botanical drawings make for great reference of structure. I also made sure to get various photos of the flowers at different angles so I can get an idea of structure, which will inform my decorative abstraction of them for the mask.
Design: I sketched the rough layout based on the placement of flowers already set forth by January's Mask to keep the series looking uniform. The most challenging part of this step was trying to keep the mask simple enough that it would be possible to carve without too much trouble. I ended up having to remove some of the flowers I had originally put in the bunch, by the end.
Work-in-Progress:
Here are a few photos of the mask in the making! I'll be putting together a time lapse video of the creation of this mask later so you can see this in motion.
After tooling and shaping.
The finished mask plus steps of the paint layering of the flowers.
To get the 'diamond' base for the mask, I painted a layer of white, then covered the white with blue interference paint, which created a 'frosted' crystalline kind of look. It's hard to capture in these photos, so definitely check out the video of the shine in action!
A video of the final mask:
A time lapse of the mask in the making:
This is a more subdued mask than usual, but I'm hopeful even subdued masks might have their fans.
Remember, you can pre-order one of these unique limited edition masks at the Ladies' Patreon. Only TEN of each mask in this birthstone series will ever be made!
For more in-depth instruction with complete step-by-step narration, a materials list, etc., check out this Premium Video Tutorial featuring the creation of February's Mask.
With February's mask fresh in my mind, March's mask presented a unique challenge with a completely different flower and color scheme.
Reference Gathering:
I always begin by gathering references of different angles of the flowers, usually photos and botanical drawings to inform the shape of the flower.
Design: Using January's mask as a base, I arranged my main blossom elements on a template in Photoshop. This time, I had two different alternate arrangements and decided to go with the more symmetrical layout. I liked that blossoms on the side provide more interesting variations of shapes and also take up more space, especially when the stems are added into the design later.
After the stems are added, the design looks something like the rough design below. Then it was a matter of cleaning up the lines, figuring out where I want my lines to overlap each other, and printing them out for transfer.
Work-in-Progress Shots
The final product:
A video turnaround of the finished mask:
A time lapse video of the mask's creation:
For more in-depth instruction with complete step-by-step narration, a materials list, etc., check out this Premium Video Tutorial featuring the creation of February's Mask.
Want to read these Design Diaries before everyone else?
Consider pledging to my Ladies of the Months Patreon. You'll get early sneak peeks, plus other exclusive Rewards!
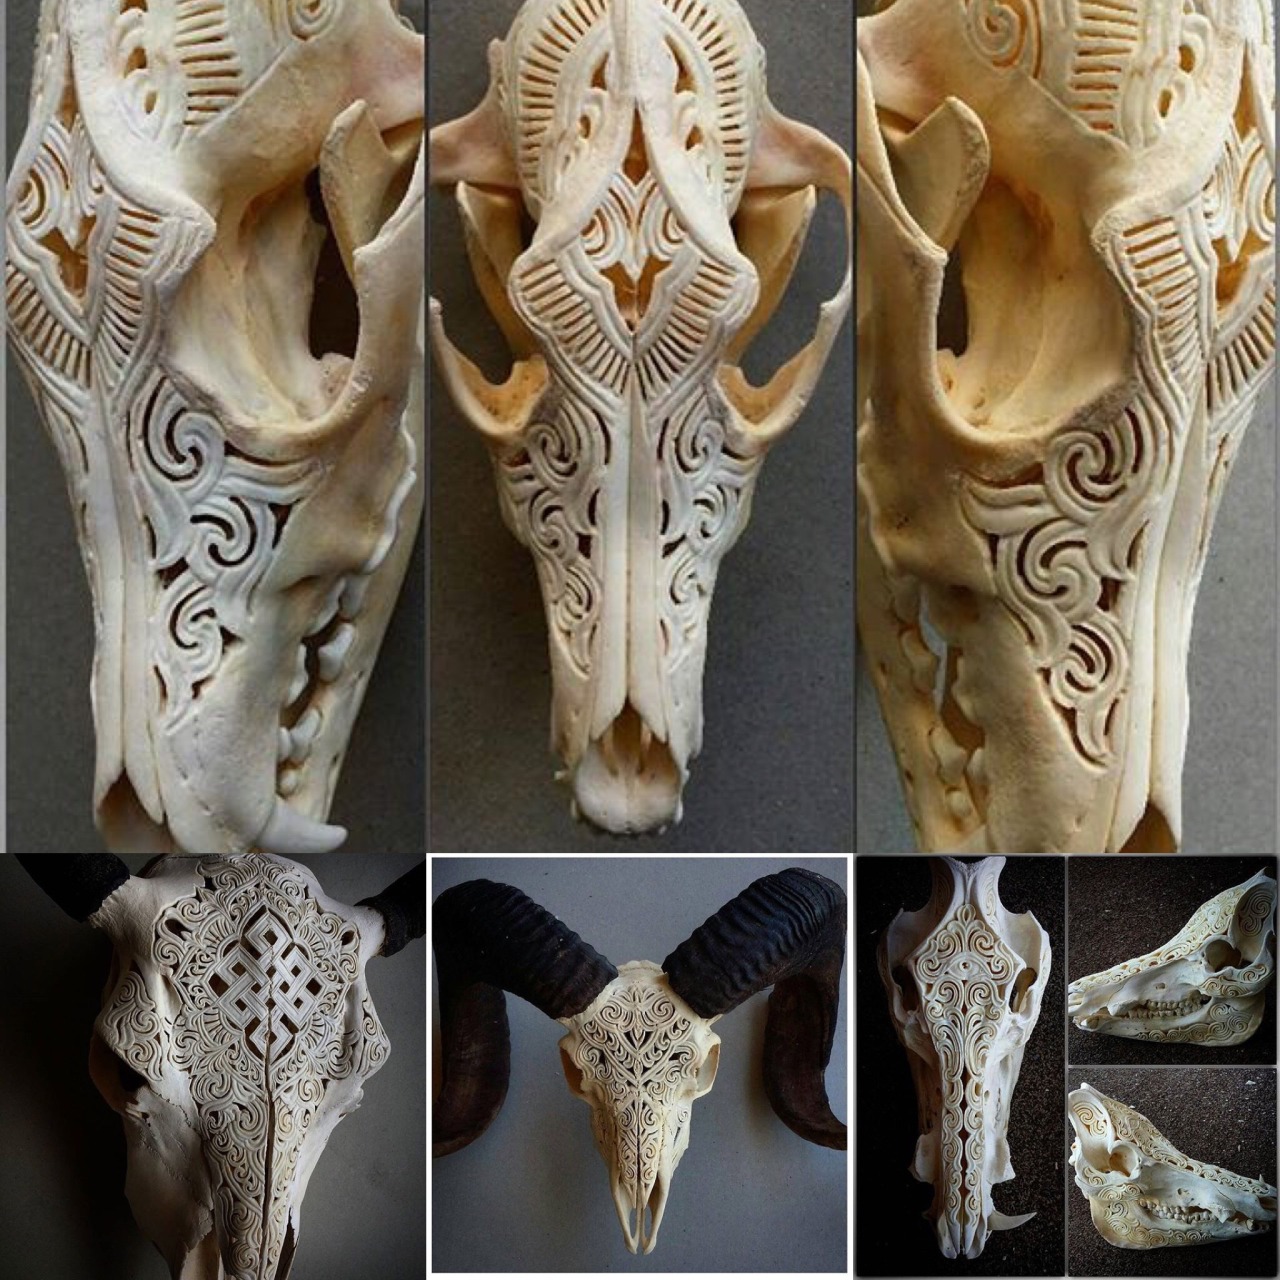
This month’s inspiring artisan is Rachel Lee. There’s something ritualistic, otherworldly, and entrancing about her tedious, meditative carvings in bone. I could stare at them forever!
I'm excited to begin work on February's mask! It's been a long time since I've been able to craft because of general life challenges, but I'm happy to dive back in for this project! While I'm a painter by day, crafting is my relaxation hobby that allows me to experiment creatively in a different way than painting does.
I've been wanting to create the rest of the month masks ever since I first made the prototype of the January Mask back in 2010. I eventually created a new version with a sleeker look and a more interesting silhouette:
Inspiration:
I'm a lover of everything of the Art Nouveau and Arts & Crafts movements. They were inspired by organic and naturalistic beauty and created lovely floral designs. I wanted to bring something of that aesthetic to my masks.
February's mask will be purple, like the Amethyst birthstone for the month. The February birthflowers are violets and primroses.
Reference Gathering:
Before I begin, I study botanical drawings and photos of the birthflowers to get a better sense of how I can abstract them. For example, I take note that the shape of the violet flower is hexagonal, which will be useful in simplifying them later.
Process:
I usually like to begin my design process by using a croquis (essentially a mannequin form that is repeated) and exploring various location for the design elements.
Here's another example of my design process utilizing the croquis figure. I also offer a downloadable croquis for others to use here.
Crafter's Choice Patrons of my main Artisan Patreon should be able to access this croquis for freehere:
However, with this particular mask design, I wanted to echo the original January mask's elements so that the entire series of month masks will look cohesive. With that in mind, I simply drew my design motif directly on top of January's pattern.
1. Major design elements.
Working in Photoshop CC, I started drawing my new design in a layer atop the original pattern for the January mask. The first thing I lay in are the major shapes of the flowers, spacing them out in such a way that the design has breathing room and isn't too busy while echoing the layout of the January mask. The blooms of the Violets and Primroses plus the large round shapes of the Violet's leaves lend themselves well to this purpose.
2. Secondary design elements. The stems and long thin leaves of the Primroses act as my secondary design elements, allowing me to have fun with overlapping knotwork-type lines that let me abstract the flower stems into a decorative element. These elements also repeat the shape of January's Snowdrops and stems for continuity.
3. Cleaning up the design. On a new layer above the sketchy layers, I actually copy and paste half of the design and mirror it so I don't have to redraw part of it. Then, I clean up the design to create slightly asymmetrical overlaps, especially in the bridge of the nose, which is generally the most interesting area of any mask design that people focus on.
Phases of the Crafting Process
TOOLS & MATERIALS:
I have an interactive list of tools and materials here.
- 8 oz Leather (I buy the single shoulder from Tandy when it goes on sale)
- Swivel Blade (I use a ceramic filigree blade)
- Leather Shears
- Modeling Spoon
- Edge Slicker
- Ballpoint Pen
- Bevel Stamps (B203, B197)
- Acrylic Paints (various brands, mainly FolkArt)
- Brushes (I reuse my old watercolor brushes. Stiff synthetic bristles work best)
- Parchment Paper
- Wax Paper
- An Oven
- Sponges
- Woodburning Tool
- Liquitex Satin Varnish
- Sticky Back Moleskin
- Ribbon
Phase 1:
The mask design is printed out and transferred onto the leather by tracing with a pen. The pressure of tracing transfers the design onto the dampened leather. The design is then cut from the hide with leather sheers.
Phase 2:
I then tool the leather after casing it over night. Casing involves dampening the leather and leaving it wrapped in plastic wrap all night so that the leather absorbs the moisture and becomes optimally receptive to receiving impressions. I use the bevel stamps and modeling spoon to press in the designs and shape them. The edges of the mask are also rounded and smoothed to create a nicer edge.
Phase 3:
Once tooling is complete, I soak the mask in water completely then bake it in the oven at a low temperature. Every few minutes, I take the mask out and shape it, pinching the nose and curving it where needed. Parchment paper is used to prop the mask in the oven and protect it from being scalded by the oven rack.
Phase 4:
I first dye the leather with leather dye, which makes for a smooth even undercoat that primes the surface for painting with acrylics next. Where I want more vibrant colors, I first paint a coat of white before I paint on the proper colors. Once I'm done painting, I give the mask a light coating with a workable spray fixative to keep the dyes from coming up when I paint the varnish on.
Phase 5:
The mask is sealed with Liquitex Satin varnish, which preserves the metallic and matte textures and provides extra protection. Sticky back moleskin is applied in key places on the back of the mask to heighten the comfort. I then finish it all off by punching holes where ribbons are tied through so the mask can be worn on the face. Finally, the mask is signed and numbered with a woodburning tool.
Enjoy this early look at the completed mask for Lady of February! If you'd like to pre-order this mask, you can do so via the Mask Collector tier over on Patreon.
After Patreon pre-orders are processed, the mask will be made available to the public at my Etsy shop. Because this is such an intense mask, only 10 of them will ever be made!
Want a more in-depth tutorial of this mask's process? Upgrade to my Premier Patron tier on Patreon to access the PREMIUM video tutorial for a narrated step-by-step look at my crafting process!
Artisan of the Month! I’ve featured this artisan before, but Cyndy Salisbury has been creating even more amazing masks since then! I love the dreamlike quality and texture of her masks with so many fragile details.
I've been working on a brand new shop at Gumroad for my digital resources! Pay what you want for most of my video tutorials so you can be inspired by them wherever you go! My free cosplay patterns have also been moved to Gumroad for stability.
Gumroad now takes Paypal in addition to credit cards, making it even more convenient than ever before! Enjoy and let me know if there are any other resources you all would like to see up online.




![Jan-mask-thumbs[1] by Angelic-Artisan](https://lh3.googleusercontent.com/blogger_img_proxy/AEn0k_tVzcYaSA9tMCsgb4ky5qIjy_BkaSsMTWSf1rcFJ_bI9IFsmQvXVnp0Xtb4CMwHCj1ZZD9nB1OBLxc4-39JYr1zDhVZ2akmQnJm9QVnwP814wiux7XmxEGMAkfBAVLe-_PTX4Aop2Uw8kXtO4cOWMXirD-4h0x9lnSSwwe5zZUnuBvQneo=s0-d "Jan-mask-thumbs[1] by Angelic-Artisan")

